The built-in slicer
A solid model is not instructions a printer can follow. The printer only knows how to move a nozzle and squeeze plastic — it needs a list of moves. Turning your solid into that list is slicing, and it's coming to Kapy so you can do it without leaving the app: pick a printer profile, apply a preset, slice, preview, and have G-code ready to print — no round-trip through a separate program, no export-import dance. This article is the workflow and the mental model, so you're ready for it; the dials worth understanding as a designer get their own article next.
What slicing actually does
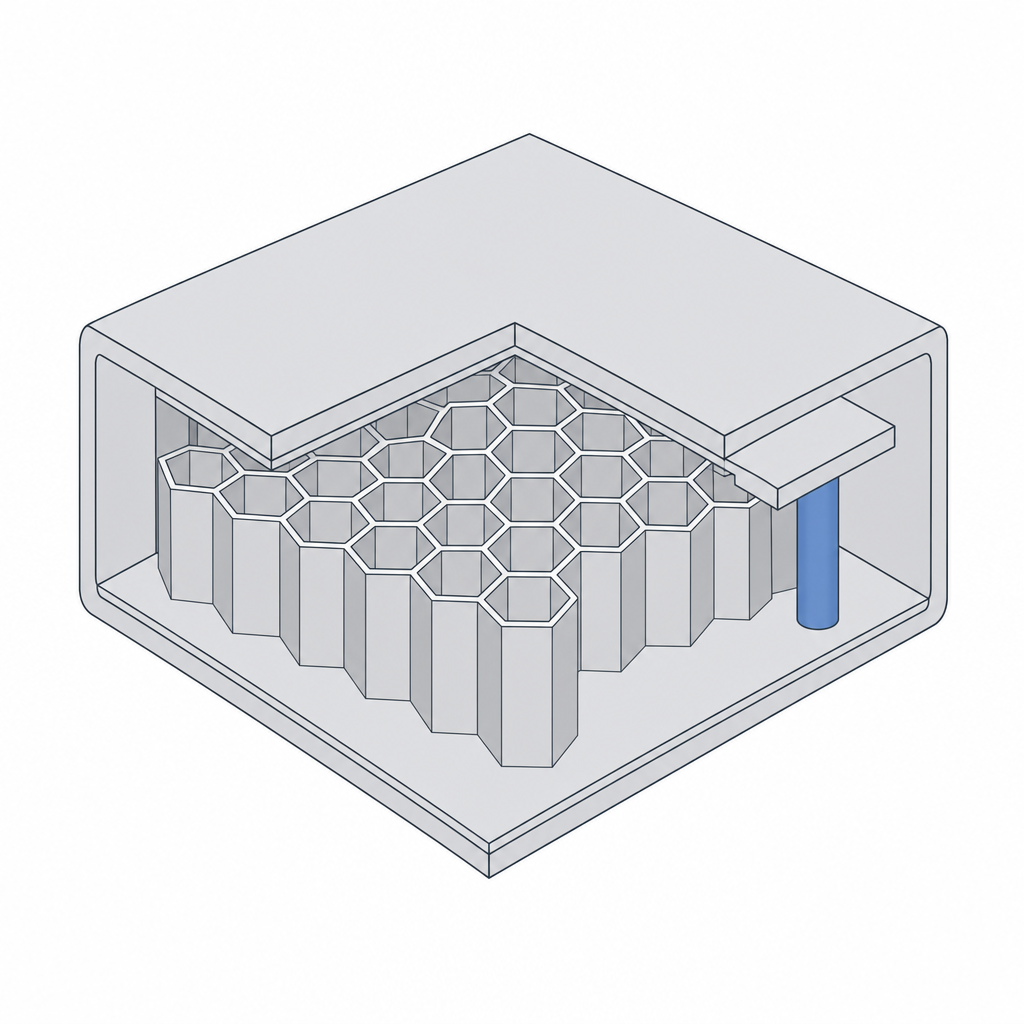
The name is literal. The slicer takes your solid and cuts it into thin horizontal layers — at the 0.2 mm baseline, a 20 mm part is a hundred slices. For each layer it works out the cross-section, then decides how to draw it:
- Perimeters — the outline loops that form the layer's walls.
- Infill — the sparse lattice filling the space inside the perimeters.
- Top and bottom — solid layers that cap the part.
- Supports — temporary scaffolding under anything that overhangs too far.
Then it chains those into nozzle moves, sets temperatures and speeds, and writes the whole thing out as G-code — the line-by-line motion language the printer reads. That's the file that actually prints.
Start with the printer profile
The first thing you choose is the printer profile — which machine you're printing on. This is not cosmetic. The profile carries the bed size, the nozzle diameter, the maximum speeds and accelerations, and the firmware flavour of G-code. Get it wrong and the slicer plans moves your printer can't make, or places the part off the bed.
Pick the profile that matches your actual machine. If your printer isn't in the list, pick the closest one with the same bed size and nozzle, and check the part fits the build volume in preview.
Apply a preset, don't tune from scratch
On top of the profile sits a preset — a named bundle of print settings tuned for a goal. Rather than setting layer height, walls, infill and the rest one by one, you start from a preset and adjust only what the part needs.
The presets map to intent, not to numbers:
- Draft / fast — thick layers, light walls. For test fits and throwaway prototypes where finish doesn't matter.
- Standard — the 0.2 mm everyday balance. Start here.
- Quality / fine — thin layers, smoother curves, slower. For visible or detailed parts.
- Strong — more perimeters and infill, for parts that take load.
A preset is a starting point, not a contract. Which dials are worth nudging by hand — and how they tie back to choices you already made in the model — is the whole of Print settings that matter to the design.
Preview before you commit
Slice, then look. The preview is the single most useful habit in the whole workflow, and skipping it is how people waste a six-hour print. Step through the layers and check the things a render can't tell you:
- Where the supports landed — and on which surfaces they'll leave marks.
- Whether the first layer sits flat and has enough contact with the bed (more on that in First layer and bed adhesion).
- Whether walls and infill look the way you intended, with no mystery gaps.
- The estimated time and material — your first reality check on whether the part is worth printing as designed.
When the preview matches what you pictured, the G-code is ready. Everything upstream — the watertight solid, the right profile, a sane preset — is what makes that last step boring, which is exactly what you want from it.