Supports and bridging
Sometimes a part really does have a surface hanging over thin air, and no amount of rotating will fix it. That is what support is for: temporary scaffolding the slicer adds under an overhang so the layers have something to land on, which you then break off afterwards. Support works, but it costs plastic and time, scars the surface it touched, and is fiddly to remove. So the goal of a good designer isn't to use supports well — it's to need them as rarely as possible.
When you actually need support
Run the overhang through the 45° rule from the previous article. Measured from vertical:
The middle branch is where most parts live, and it is the one beginners miss. A moderately steep overhang almost never needs support — it needs a small change to the model so it stops being an overhang.
Designing supports away
Two moves handle the vast majority of cases.
Chamfer instead of overhang. Anywhere a flat face would jut out horizontally, replace the sharp underside with a 45° chamfer. The classic spot is a horizontal hole or a boss sticking out of a wall: a flat ceiling over the hole sags, but a 45° chamfer under it prints as a clean, self-supporting slope.
Use a teardrop for horizontal holes. A round hole printed with its axis horizontal has an overhanging "ceiling" at the top — the last layers have to bridge across the widest part of the circle and they sag inward, leaving the hole out-of-round. Reshape the top of the hole into a point — a teardrop — and every layer leans on the one below at a safe angle. The hole stays accurate and needs no support.
Bridging: crossing a gap with nothing below
There is one case where the printer happily prints over thin air: a bridge. When the nozzle has a solid anchor on both sides of a gap, it can stretch a hot strand straight across, and as long as the span isn't too long the strand stays taut enough to hold its line. This is how the flat top of a hole, or the roof of an enclosed pocket, gets printed without support.
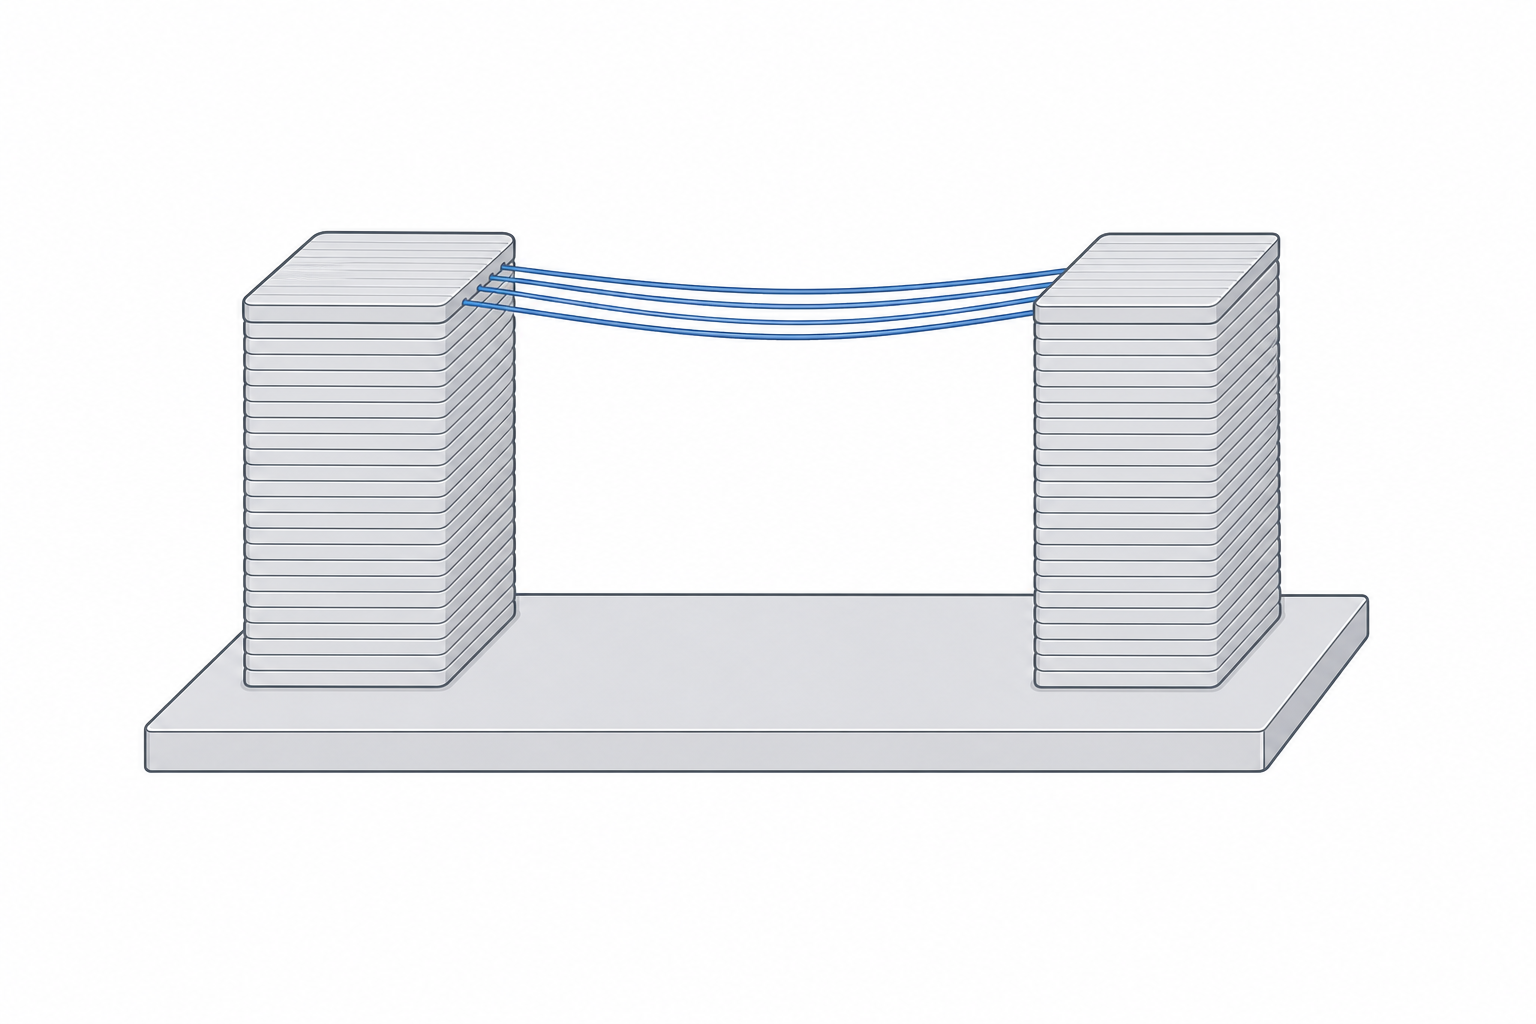
Bridges have limits. Short spans (up to roughly 20 mm) come out crisp; longer ones (up to ~50 mm on a well-tuned machine) sag in the middle and look rough underneath; beyond that they droop into a mess. So you can rely on bridging — just design within it. If a span is too long, add a rib to split it into two shorter bridges, or reorient so the gap closes with a chamfer instead.
| Situation | Safe limit |
|---|---|
| Overhang from vertical | up to ~45° unsupported |
| Underside chamfer | 45° prints clean |
| Reliable bridge | up to ~20 mm crisp, ~50 mm rough |
| Horizontal hole | use a teardrop above ~8 mm Ø |
When you can't avoid it
Some parts genuinely need support — a wide flat ceiling, an isolated island floating in mid-air. When that happens, keep two things in mind. Support always marks the surface it touches, so orient the part (if you can) so the supported face is one nobody will see. And in the slicer, support only needs to reach the overhang, not fill the whole part — but that is a slicing setting, not a modelling one. The modelling job is to give the slicer as little to support as you can.