Annealing and strengthening
Most finishing changes how a part looks. Annealing changes what it can withstand. Put a PLA part in an oven at the right temperature for the right time and it comes out measurably stiffer and able to take far more heat before it softens — a genuinely different material property, coaxed out with nothing but a controlled bake. It sounds like a free upgrade. It isn't: the same heat that toughens the part also lets it shrink, sag and warp, so it comes out a different size than it went in. Annealing is a bargain, and the price is paid in dimensions.
Why heat makes plastic stronger
Printed thermoplastic carries two hidden weaknesses. First, it's full of frozen-in internal stress — plastic that was stretched and quenched as each bead cooled unevenly, leaving the part under tension it doesn't need. Second, semicrystalline plastics like PLA come off the printer only partly crystalline: the molecules cooled too fast to line up into their strong, ordered packing, so much of the part is disordered and weaker than it could be.
Annealing fixes both. Held above its glass transition but below melting — warm enough that the molecular chains can move, cool enough that the part keeps its shape — the plastic relaxes its frozen stresses and its chains drift into more crystalline order. More crystallinity means a stiffer part with a higher heat-deflection temperature (HDT): an annealed PLA bracket can hold its shape at temperatures that would slump a raw one. Carbon-fibre-filled and other engineering filaments respond especially well, because the fibres reinforce a matrix that annealing has made stiffer and more heat-resistant.
The catch: it shrinks and it moves
Here's the cost, and it's unavoidable. As the chains reorder into denser crystalline packing, the plastic takes up less volume — the part shrinks. And because it's soft while it's warm, gravity and its own relaxing stresses pull it out of shape: unsupported spans sag, tall thin features lean, flat faces cup. You get a stronger part that is smaller and slightly distorted — often shrinking two to five percent, rarely evenly. A dimension you cared about is no longer the dimension you drew. And there's a second, less visible cost: raising crystallinity also makes the part more brittle. It comes out stiffer and more heat-resistant, but it gives up impact toughness — what it gains in stiffness it loses in shrugging off a knock.
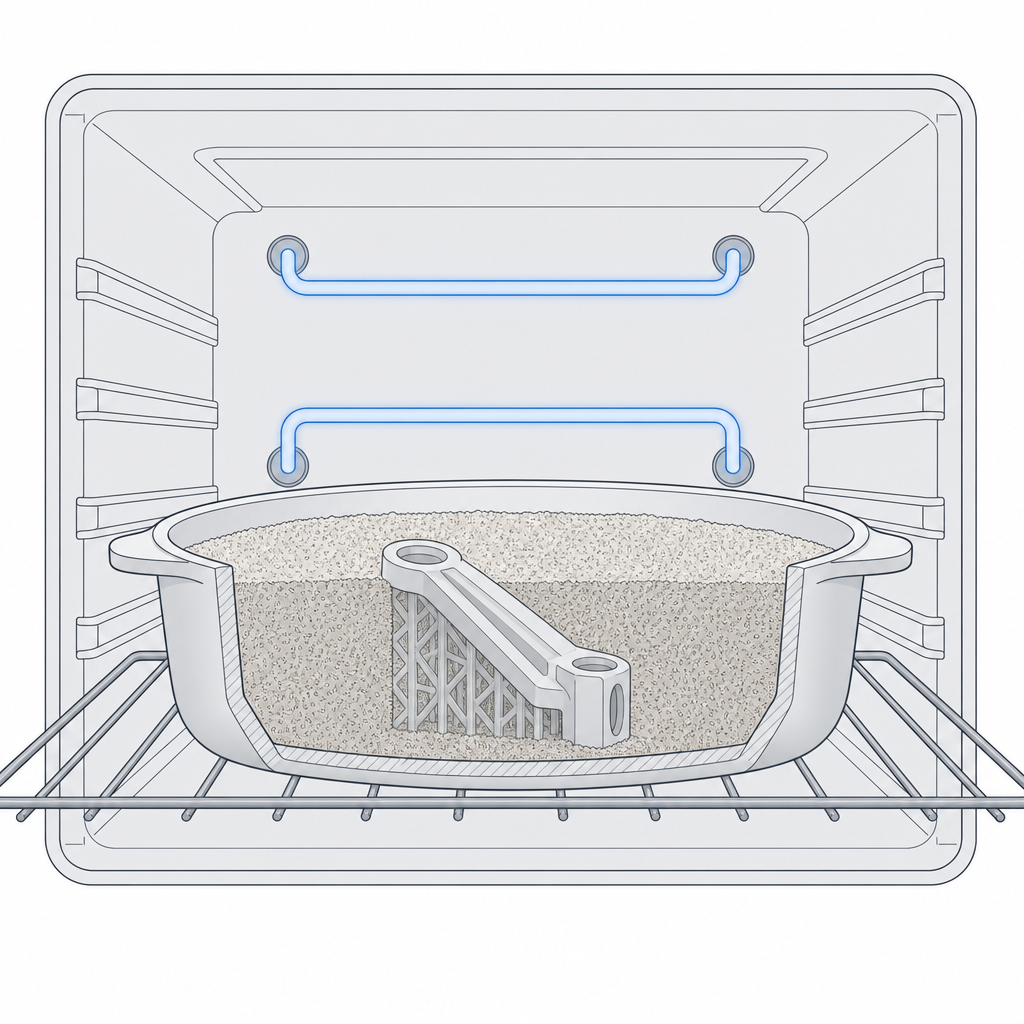
The standard defence is to anneal the part buried in a support medium — packed in salt, fine sand or plaster in the oven — so the medium holds the softened plastic in shape and resists the sag while the crystallisation happens. It cuts the distortion a lot. It does not stop the shrinkage.
| Material | Anneal benefit | Shrink / distortion risk |
|---|---|---|
| PLA | Big jump in stiffness and HDT | High — shrinks noticeably, sags without support medium |
| PETG | Slight: barely crystallizes (mostly stress relief) | Moderate — warps if unsupported |
| CF-filled (PLA/PA) | Large HDT and stiffness gain | Moderate — fibres resist distortion, still shrinks |
| ABS / ASA | Small — mostly stress relief | Low–moderate — already fairly heat-stable |
Designing around a part that changes size
The design lever is blunt because the physics is: annealing changes the size of the part, so don't anneal anything whose size you can't afford to lose. A part with press-fits, threaded holes, bearing bores or mating faces that must stay true should either not be annealed, or be designed to be annealed from the start.
If you do want the strength, there are two honest ways to get it. Either keep the critical part unannealed and add strength through geometry instead — thicker walls, more infill, ribs and fillets, the whole toolkit in Strength and structure — or anneal a test coupon first, measure how much it shrank in each direction, and scale your model up to compensate so it lands on-size after the bake. That second route only works if you validate it: print the coupon, anneal it exactly as you'll anneal the real part, and measure, the way Validate before you print insists. Guessing the shrinkage is how a carefully compensated model comes out just as wrong as an uncompensated one, only in the other direction.
The rule that ties the section together holds here too: decide the finish while you're modelling. If a part must be both strong and dimensionally exact, solve the strength with geometry, not heat.
Strengthening one part has limits; sometimes the part is simply bigger than the printer. When that's the problem, you print it in pieces and join them — Gluing and splitting big parts.